Reminder: Work on your mic technique!
We are regularly asked about how to use a mic correctly, so here are our guidelines, again. Keep working on it, and soon it will be comfortable and second nature.
Tips for Microphone Technique
The mic can be rather daunting when you first start out in voice-over! Practicing at home with one will help to reduce the newness of it, and the distraction from it.
Here are some tips to get you started.
PROXIMITY
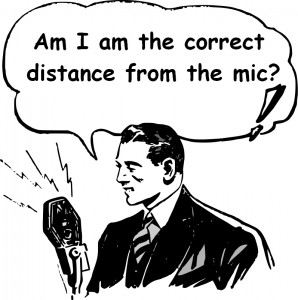
Find your own comfort zone, with regard to proximity. Many voice-over artists will angle slight to the right or left of the mic, for two reasons:
1) This can reduce or eliminate pops from plosive sounds like t, b, or p. When you're in a session, engineers can help by putting a “pop shield,” a stocking device or foam shield, in front of the mic. But if you angle- speak slightly across the mic - you create a similar effect to a pop screen.
2) You will be able to see and read your copy off to the right or left, without the mic being right in front of it.
VOLUME
Well, the mic is there to amplify the sound, so you can be as soft or loud as the job requires, but you need to work with the mic to create this. If you are recording yourself, make sure you are getting a solid wave form, and if you are working with an engineer s/he will do this by first getting a good level of your planned volume before recording the take. You can’t speak softly while the engineer gets a good level, and then shout during your take!
Every different session will call for something different in the way of volume . For example, if you want low, deep sounds from your voice it can help to get very close to the to the mic, perhaps two to three inches. If you know you are going to really project, and speak louder, stand back, seven to nine inches from the mic, so your voice doesn’t distort.
Then trust the mic and your own voice and skill. If you need drama and a “dark” interpretation, you might try a whisper, or near-whisper. And if it is comedy, use a little more level and smile the whole time you are speaking. It is amazing that a smile can come right through the microphone to the listener!
LIGHTING
You must be able to see well, to read your copy! Make sure you are well prepared with contacts or reading glasses if you need them, and some artists even carry a small clip-on light, which runs on a battery, to attach to the stand holding your copy. Lighting must be ample to reduce the possibility of unnecessary errors when you read. In many studios you can ask to increase the level of light if it isn't bright enough for you.
TECHNIQUE AND SKILL
Do your breathing exercises. Practice reading all kinds of different material at home in front of the mic. Try things and experiment at home to learn what your real strengths are. And stretch yourself to try new things. Try different pitches, different volumes, mimic cartoon characters or famous actors or comics. Read out loud in front of the mic and record it if you can, to listen back - you will learn so much from hearing your own work.
The more you develop and then employ your microphone technique and skill, the less the engineer and producer have to rely on enhancements in the studio. The less they work, the faster and easier the session, and the more likely you are to be re-hired! Plus, comfort and skill with the microphone shows your professionalism, getting the job done well and quickly, which is the producer’s goal!

