PeanutButterStoryTime
Yuri and Tara are making use of their reading skills and hosting a fun weekly bedtime story show on Unlocked called PeanutButterStoryTime. Join them Tuesday nights 8p PST on Unlocked
A Peek Into The Secret World Of The Voice Actor
Interested in pursuing a career in VO? Curious what goes on behind the scenes in a business where people talk funny for money? This book offers a fun and comprehensive look at what it takes, what goes on and what it’s like behind the mic from two working pros who started from scratch.
Yuri and Tara are making use of their reading skills and hosting a fun weekly bedtime story show on Unlocked called PeanutButterStoryTime. Join them Tuesday nights 8p PST on Unlocked
 Here's a great tip and exercise for voiceover artists: use TV commercials as a source of practice. Really listen to the commercials on your TV or radio. When you find a good commercial you like, try to parrot the VO actor who is speaking the lines. You'll be repeating the words, of course, but also try to copy, as exactly as you can, the nuances, the tone, the inflections he or she uses, and the musicality.
Then mute or turn off the TV or radio and grab any random bit of text, such as an ad in a piece of mail or magazine. Try to bring the new tone and vocal patterns you've been copying to these new words. You will be using the style you've been mimicking with this new material.
This will really start to train your ear and attune you to what is currently “hot” in the advertising world. And it gets you practicing, reading aloud, and using your voice in new ways.
And it's fun! Enjoy!
Check out our latest newsletter, below. There's a sign up button over on your right if you'd like to receive it!
We just returned from our Australian adventures and it is back to work and back to summer! Thankfully Yuri and I have been working like mad in VO, comics and videos, and we are deep in post on Topsy McGee. Yuri has been writing a bunch and we are enjoying the long days and the warm nights!
I hope July is jammed full of as much fun as you and your inner childlike-wonderment-filled self can make it!!
Tara :) (&Yuri)

Check out our latest newsletter, below. There's a sign up button over on your right if you'd like to receive it!
We are well into spring with May in full bloom. I hope you are finding love (of yourself, of life, of others) and generally enjoying the beautiful weather. You can even use hypnosis to help move you toward a more happy life! I have been fortunate to book several commercials, so let me know if I appear on a screen near you. Yuri has had a wonderful run of some new VO projects and been hard at work writing (he even won a few awards) and is working on a couple of scripts and we are headed to OZ on a summer convention adventure! May your May be bountiful and fun!
Tara :) (&Yuri)
Yuri Lowenthal & Tara Platt: Raise Your Voice (Acting)!
 Here's a helpful voiceover exercise:
We call it the "chewing hum." It can warm up the different areas where your voice will resonate. Once again, when your voice resonates, it bounces around a certain area of your body, whether that’s up in your face, nose or head area, your throat, or your chest or belly.
Here's what you do:
1. Keep your mouth and lips closed and begin to hum.
2. Start chewing, as if you were eating something tasty, as you keep humming.
3. Now use your hands to feel the vibration in the front of your face, your nose, your cheeks, and gently allow your hands to move to your neck and throat, and perhaps even onto your belly so that you can feel how your voice resonates in different areas of your body.
Now to begin to identify where your voice is resonating, let’s concentrate on specific sounds that tend to resonate in different areas. Certain sounds we create generally vibrate more toward the head, while others, because we use different muscles to make them, may vibrate lower, toward the belly.
If you can learn to control where you choose to place your voice, you can begin to use it in more powerful and interesting ways.
 Check out this cool video on straw phonation from Dr. Ingo Titze.
A respected vocal scientist, Dr. Titze demonstrates vocal exercises that consist of creating sounds into a straw. After a few minutes of these exercises, your voice will feel like it is coming out of your eyes (a buzzy feeling in your face) which he explains is the optimal placement for your voice.
He sings the National Anthem into a straw, which, he explains, helps to strengthen and train the vocal folds for the best transfer of power from the glottis to the lips. He demonstrates the "semi-occluded" phonation which balances the air pressure around the vocal folds: sub-glottal (below) and super-glottal (above). Examples of these semi-occluded phonations are the raspberries and lip buzzing sounds you recognize from our tips and your vocal coach.
Cool, huh? This will all make more sense when you watch the video!
Here is an article Dr. Titze wrote explaining the concept in more depth:
"OVER THE PAST TEN YEARS John Nix and I have been describing vocal exercises that utilize phonation into a straw.1 These exercises are part of a bigger picture of training vocal fold adduction, registration, and epilarynx tube narrowing for the best acoustic power transfer from the glottis to the lips. Use of a thin straw is not the only way to facilitate this power transfer, but a semi-occlusion at the mouth is a requirement. Lip trills, nasals, / u / and / o / vowels, bilabial fricatives, and other semi-occlusions can all be used to meet the objective. 2"
READ MORE
By Titze, Ingo: Academic journal article from Journal of Singing, Vol. 66, No. 5
Article details
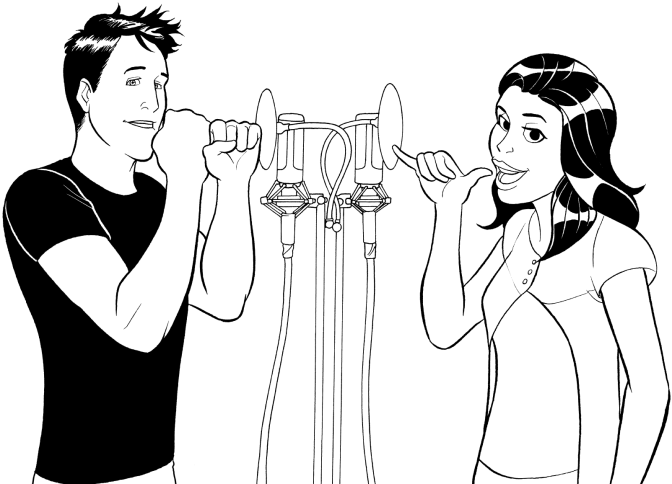 The microphone is very sensitive, so where should you stand in relation to it? The engineer might ask you to get a little closer or stand a little farther back, but here's a good place to start: open up your hand, palm up. Now, close just your three middle fingers (the index, middle finger, and ring finger). You're left with only your pinky finger and thumb extended, much like the popular surfing Hang ten sign or, if you hold your hand up to your ear, the international Call me! sign. The distance from the tip of your pinky to the tip of your thumb is about the distance your mouth should be from the mic. You can also put two fists on top of each other to measure roughly the same distance.
An exception to this mic distance rule is when you're working with a loop group doing ADR and walla. In that case, you'll be working in a larger room, moving around a lot with a group of people, and your distance from the mic will be much farther.
Now, obviously, these rules may change depending on the type of sound you're trying to create. For example, if you're going for a whispered, or soft, sultry quality, you may wish to get a little closer in on the mic. For yelling and screaming you will probably want to back off so as not to blow out the engineer and whoever else may be in the studio.
When you speak, the sound comes out in a cone shape; so while a mic will generally pick you up no matter where you are in the booth, you'll always get your best sound if you're standing directly in front of it. And once you're in position, pay attention to where you are and how that feels. It'll be important for you to maintain a pretty consistent position throughout your session so that the recording quality matches from line to line and session to session.
How much freedom do you have to move around? The answer is … some. You shouldn’t be worried about keeping your head stock-still. You have some play: about 15-20° to the right and to the left. The same goes for up and down. There’s a stand in the booth to hold your script, so feel free to tilt your face down to read from it. The mic can take it, and so can the engineer.
You definitely don’t have to memorize each line and then look up to deliver it, although some people might do this, particularly if they’re looking up to sync with mouth movements on a screen. The trick is to do the looking with just your eyes, and not change the relationship of your mouth to the mic in the middle of a take. Moving your head will make a difference to how the recording sounds. So, before you say the line, decide how you want to place your face in relation to the mic.
Movement only begins to cause problems in two cases:
1. when the movement itself gets noisy, either due to your clothing/shoes or your flailing about and knocking into things
2. when your movement carries you too far from the mic or too close to the mic
Either of these cases can cause you to have to do another take of the line because there are limits to what even the engineer can compensate for.
+++++++++++++++++++++++++++++++++++++++++++++++++++++++++++++++++++
Check out our VoiceOverVoiceActor website for more tips and exercises. We post daily VO tips on Facebook and Twitter, and our book, Voice Over Voice Actor: What it’s like behind the mic includes a wealth of exercises to build your voice and keep it ready for a successful voice over career!
 Some of you may have seen the article on CNN a month or so ago, but check it out if you haven't.
Respect for voice actors and our profession is increasing at a wonderful rate! From household names like Chris Rock, and Danny DeVito, to less known but extremely successful voice actors like Frank Welker, Peter Cullen, our industry is spotlighted in this article. Check it out: http://www.cnn.com/2012/11/01/
“It's even gotten to the point where Chris Rock, star of the "Madagascar" franchise, took the opportunity of presenting an animation Oscar to quip about how "easy" it is to do voice work.
Rock joked that all he had to do was say the lines, "And then they give me a million dollars." (No less than Danny DeVito took issue with that characterization.)” READ MORE

You can start identifying your own voice by making a list of adjectives that you feel describe your voice and your way of speaking. Then, because we often have trouble being objective, pick five people who know you well, and five people who know you less well, and ask each of them to come up with five adjectives to describe your voice. Remind them that they’re not trying to describe you or the way you look, but specifically your voice. If they have trouble coming up with descriptive words, maybe you could compile a long list of adjectives to make it easier on them. Here are a few adjectives you might choose (also see our suggestions in “Play to Your Strengths” in Chapter 10 of our book, The Demo):
abrupt energetic sincere curt fun-loving
smooth confident guarded upbeat warm
See which of the words suggested by your friends resonate with you, especially if a certain adjective comes up more than once. That means there’s usually something to that suggestion.
As you become more familiar and comfortable with your voice, you may find that you can start to identify the attributes that are specific to you. Your voice might be raspy or it might be crisp and clear. Maybe you have a slight drawl from living in the South, or a particular vocal pattern that people identify with you. Identifying your vocal characteristics is a good way to start honing in on what types of characters and qualities you might be able to bring to the table.
Some people call this description of your voice and delivery a vocal signature or style; others simply call it your sound. As soon as you zero in on your sound, you’ve got a strong place to start and to build outward from. It’ll be your safe place that you can always fall back on, and probably the place from which you’ll do most of your work.
Vocal signature comes up a lot in commercial VO. You might get hired because of your specific sound and attitude – which the client feels perfectly represent the product, and suddenly you’re the spokesvoice for that brand.
Remember, the most important thing here is that you are discovering for yourself your own personal and particular vocal quality and sound. There are so many opportunities in the field of voice-over that there’s no reason for you to feel the need to alter your own sound. Simply learn to market what you have and who you are, and that’s when things will really start popping!
Check out the rest of the website for tips and exercises, we post daily VO tips on Facebook and Twitter, and our book, Voice Over Voice Actor: What it’s like behind the mic includes a wealth of exercises to build your voice and keep it ready for a successful voice over career!
 There are so many different elements that contribute to how a person sounds, and if you can become aware of them, you can use them to your advantage to help you create some really fun, funky, and fancy voices for your repertoire. Start with the speed which is simply how quickly you’re speaking: slow, medium, or fast. People often joke about Southerners (from the U.S.) speaking in a slow, meandering drawl, while folks from the northeast (U.S. again) are more fast-paced, quick, and to the point. Play around with your speed to find fun patterns, not only of the words, but of the phrases and sentences.
Then move to the pitch. Generally a voice can be pitched high, mid-range, or low. Some examples of a high-pitched voice might be the aforementioned Spongebob Squarepants, or the actress Ellen Greene, or yourself after sucking on a helium balloon. A low-pitched voice calls to mind James Earl Jones, Tom Waits, Ron Perlman, or Lurch from The Addams Family. The rest of us fall somewhere in the middle.
One person’s mid-range pitch may be your low or high depending on how you’re built, and depending on what sex you are: men naturally tend to have a lower register, while women’s voices are usually higher. Play around with your pitch a little and see what happens. It can lead to touching moments, funny moments, and downright scary moments sometimes.
The final basic element is volume: loud, conversational, and soft. Perhaps a male character speaks in a loud booming voice and is always being asked to quiet down (maybe he worked for years in an anvil factory). Or a female character’s voice is shy and whispery, and no one can understand her (too many years as a librarian, perhaps). See how entire characters can develop out of how loud or soft you choose to speak?
 Now look at these three elements: speed, pitch, and volume, and break each of them down into its low, medium, and high grades. The result is nine different qualities to mix and match in three dimensions. Imagine a giant 3-D tic-tac-toe board with each quality represented by its own dimension. It’s kind of like a simplified vocal Rubik’s Cube of choices, with speed represented by height, pitch represented by width, and volume represented by depth (see diagram below). Now pick one of the intersections of these elements (a small cube within the cube) and see what combo you get. Here are quality groupings you’d end up with if you selected each of the numbered cubes in the illustration:
Cube 1: a fast, low-pitched, soft voice
Cube 2: a slow, mid-range, loud voice
Cube 3: a medium-speed, high-pitched, conversational voice
You can come up with a variety of other combinations simply by mixing these three different qualities. This doesn’t even take into account other flair you can add, such as attitude, accent, or age. The possibilities are (nearly) endless!
Check out our latest newsletter, below. There's a sign up button over on your right if you'd like to receive it!
So much happening as we near the end of this wonderful year. Personally, I have been pushing myself and my career as part of a 42 Day Book a Job Challenge and I am thrilled with my results! We've just completed filming some really exciting things for Shelf Life Season 4 (commercials, music videos and all new Season 4 eps, oh my!). The holidays are fast at hand and I'm in need of a new book or tasty treat, so let me know what I should add to my bookshelf or plate! Here is to soaring into the new year and a lovely, safe and joyful holiday for us all.
Yuri Lowenthal & Tara Platt: Raise Your Voice (Acting)!
Read More: Naturally November Newsletter Nov. 2012

Read More: Naturally November Newsletter Nov. 2012
 Learn about your breathing, then expand or lengthen it, to really increase your skills in VO!
1. Begin by lying flat on the ground and placing your hand on your abdomen just below your ribs.
2. Feel the natural rise and fall as you breathe.
3. Notice the natural ‘pause’ between inhale and exhale.
This is how your body breathes without you trying to do anything to control it. As you breathe, there should be four sections to each breath: 1. an inhale, 2. a pause, 3. an exhale, 4. a pause. We usually don’t feel the pauses because they’re short and they happen naturally, but they’re there, all right.
This next exercise focuses on lengthening, or expanding, your breath:
Begin by inhaling for a three-count, holding for a three-count, exhaling for a three-count and holding for a three-count.
Do this until it’s comfortable and then start to increase your count, four-count, five-count, etc. If you start to feel lig ht-headed or dizzy, stop immediately and take a break.
See if you can comfortably work up to 5, 6, 7 or even 8, 9, 10.
(Tara once had a voice teacher who could breathe in and out on a thirty-count, which comes with a lot of practice. Being able to hold your breath and control your breathing allows you to play with your voice more, giving you more range and stamina, which could come in handy for things such as recording long passages for audiobooks or characters who really ramble on.)
 How do you start your warm up? And is there a correct order for warm up exercises? Here are our recommendations:
1) WARM UP YOUR VOCAL CORDS: Begin by gentle warm ups - you may notice when you first wake up that your voice sounds sleepy. Humming and feeling the resonance in your chest is great for getting the voice gently moving.
2) ENUNCIATION: After your voice starts to feel a little less groggy, begin to focus on enunciation, or the art of speaking clearly. Pay attention to the different ways the mouth must move in order to create the following sounds:
3) ARTICULATION: Similar to enunciating, articulation relates to speaking distinctly. Let’s call the moving and non-moving parts of your face and mouth that help you articulate words (lips, teeth, tongue, roof of the mouth) the vocal creators. Articulation is a function of how these vocal creators work together to make sounds. After practicing the enunciation exercises ptkt, bdgd, wewa, try to pull everything together for articulation by saying these rhymes and tongue twisters:
4) WORK YOUR RANGE: And finally, you’ll want to work on your range (the high–to-low pitches that you can take your voice to). Here’s an exercise for expanding your range:
 From Wiki: Thoracic diaphragm: “In the anatomy of mammals, the thoracic diaphragm, or simply the diaphragm, (Ancient Greek: διάφραγμα diáphragma "partition"), is a sheet of internal skeletal muscle that extends across the bottom of the rib cage. The diaphragm separates the thoracic cavity (heart, lungs & ribs) from the abdominal cavity and performs an important function in respiration.”
As a VO artist you need to know about and use your diaphragm! It is our big breathing muscle, a dome-shaped muscle at the base of your lungs. This shelf of muscle is controlled by the nervous system; it contracts when we inhale, so that a vacuum is created in our lungs and air rushes in to fill it. The opposite happens when we exhale; the diaphragm relaxes and the air in the lungs rushes out.
Breath is the fuel of the voice, whether it is for singing or for voice over work. The stronger the diaphragmatic muscles, the better you can regulate the amount of breath that is pushed over your vocal cords, so improving the control you have over your voice in your sessions. When the diaphragm is strong you can ensure a steady stream of air for your needs, you can speak longer without needing a breath, and you have more power for volume or attack in your speaking. And the stronger the diaphragm, the less effort all of this is for you!
Here is an exercise to help build the strength of your diaphragm, from our book, Voice Over Voice Actor: What It’s Like Behind the Mic!
1. Place your hand on your diaphragm.
2. Open your mouth and allow the tongue to relax and hang out of your mouth.
3. As quickly as possible, inhale and exhale, like you’re a dog panting.
(of course, if you feel dizzy or lightheaded, stop immediately)
We’ve been focusing on strengthening your diaphragm, but that won’t be the only thing you’ll be using. Your diaphragm will be working in conjunction with your mouth, tongue and mind so they must be ready to go as well. Articulation, or the ability to speak clearly, is a crucial element to a voice actor’s repertoire. Not every character you play will need good articulation (and sometimes you may even be told to articulate less), but it is always better to have it up your sleeve, so that if you’re slurring your speech, it’s a choice rather than an issue.
We hear good feedback from folks about this exercise, and we find it very helpful.
Give it a try!
1. With your lips closed, start to hum.
2. Then make chewing movements, as if you were eating, and keep humming the whole time.
3. Now use your hands to feel the vibration in the front of your face, your nose, your cheeks, and gently allow your hands to move to your neck and throat, and perhaps even onto your belly so that you can feel how your voice resonates in different areas of your body.
Using the chewing hum can warm up the different areas where your voice will resonate. Once again, when your voice resonates, it bounces around a certain area of your body, whether that’s up in your face, nose or head area, your throat, or your chest or belly.
Now to begin to identify where your voice is resonating, let’s concentrate on specific sounds that tend to resonate in different areas. Certain sounds we create generally vibrate more toward the head, while others, because we use different muscles to make them, may vibrate lower, toward the belly. If you can learn to control where you choose to place your voice, you can begin to use it in more powerful and interesting ways.
Check out our latest newsletter, below. There's a sign up button over on your right if you'd like to receive it!

1. Keeping your lips together, like you were making imaginary car (or motorboat, if you prefer) “brrrm, brrrrm” noises, and allow your lips to make a “raspberry” type sound (like a good old-fashioned Bronx cheer without sticking your tongue out), or lip trill. Begin at the bottom of your possible range and while continuing the lip trills gradually raise your pitch until you hit your highest note possible.
2. Now reverse direction. Start at the top of your range and move downward thru your natural pitch to your lowest note.
3. Continue your lip trills while going from low to high and back to low again. It’ll sound a little like a siren.
4. Repeat the sirens 3-5 times until you feel like your voice is beginning to get warmed up.
5. This can be hard to describe on paper. Feel free to visit this link ( ) to see an example.
Lip trills are a great way not only to warm up your face and resonators in your sinus cavities, but also helps keep your vocal cords and neck muscles from tensing up while you’re warming up your voice. Don’t worry if your voice cracks during the sirens. That’s just a natural part of expanding your range. We all have “head tones” (high) as well as “chest tones” (low) in our range, and in order to move back and forth continuously from one to the other, you have to move through your natural “break,” which is the sound that often people associate with a teen boy going through puberty. One of the reasons for this is that the vocal cords are actually growing and stretching and sounds that used to be easily within one range move to a different register, and the voice “cracks” as it pushes through unfamiliar territory. So in addition to warming up your voice, this exercise can also help you widen your vocal range.
Sirens w/out Lip Trill
1. Allow your mouth to hang slightly open, and begin an “ee” sound at the bottom of your range. As you exhale, slide your pitch higher and higher until you hit your highest note possible.
2. Now reverse direction. Start at the top of your range and slide your pitch downward until you hit your lowest note.
3. Make sure your face and jaw are relaxed and comfortably open while making the siren sound.
4. Repeat the sirens 3-5 times until you feel like your voice is warming up.
Practicing sirens can really begin to stretch your range and gently allow the musculature in your face and neck (as well as your vocal cords) to begin to become accustomed to the sounds you’ll be making while acting.
Whether you have a high or low-pitched voice you can also begin to think about the placement of the sound you’re making. This is separate from the pitch. Placement relates to the physical location in your body where your voice is resonating. For example, if you have a head cold and are all stuffed up, you might sound very frontal, or nasal, since your sinuses are blocked and thus blocking the sound from escaping completely, therefore creating a very frontal resonant sound. If you drop the sound way back to the back of your throat, then you would almost sound like you were swallowing the sounds, creating a very different quality altogether.
Begin to play around with extremely frontal, a mid-range placement as well as a back placed sound. This is something that you can bring into your work and begin to pick and choose where certain voices you create will be placed and where others will lie instead. [Should this be a new exercise to help develop awareness of where you’re placing your voice?]
People tell us this exercise from our book, "Voice Over Voice Actor: What It's Like Behind the Mic" really helps them, so we thought we'd blog it again:
Try each of these phrases in the emotions suggested at the right. It will really work your ability to quickly change the feel and tone of your expression.
Exercise: The Phrasinator
Then if you want continue playing with the phrases by trying each of the different descriptions with each of the sentences. To take it one step further, try adding punctuation (? . !) and see how that might change the way you say the lines.
Really listen to the commercials on your TV or radio. When you find a good commercial you like, try to parrot the VO actor who is speaking the lines. You'll be repeating the words, of course, but also try to copy, as exactly as you can, the nuances, the tone, the inflections he or she uses, and the musicality.
Then mute or turn off the TV or radio and grab any random bit of text, such as an ad in a piece of mail or magazine. Try to bring the new tone and vocal patterns you've been copying to these new words. You will be using the style you've been mimicking with this new material.
This will really start to train your ear and attune you to what is currently “hot” in the advertising world. And it gets you practicing, reading aloud, and using your voice in new ways.
And it's fun! Enjoy!
(Exercises republished from VoiceOverVoiceActor.com/Take-Action)
To help improve your diction, lightly grip a pencil (horizontally) between your teeth, so that you are forced to really work your tongue to create the sounds.
Practice speaking out loud the following 3 tongue twisters, clearly enunciating each word:
A thin little boy picked six thick thistle sticks. Sidney Shelly flies through thick fog. This thatched roof is thick.
After saying them each several times, remove the pencil and try saying them again. Listen to how much the clarity of your speech has improved.